Monday, July 18, 2011

Initial D project part 3

The last thing to do is to hack in the 360 wheel. To do that you need to dismantle it.

First remove these allen bolts and lift off the face plate


Then undo a load of T8 security torx screws on this base and to remove the bottom part of the white case below

That'll reveal the gubbins


You need to disconnect this lead which runs to the buttons in the wheel


Then remove these allen bolts which will allow you to reove the wheel entirely

Like so


I bought this daytona dash to use. It avoids hacking up the ID one to allow the conversion to be undone in future if I want.


I then fabricated a board that attached to the rear of the dash and screwed this to it. I trimmed the case down a bit but kept it there as it was useful for the pcb mounting etc. I'll put up meausrements for the board when I remember. I put a lot of screws through that grey section in the pic above into the wooden board. The central axle sits like this. Notice I had to trim the central plastic section the steering axle runs through. I also had to file the metal mounting plate to expand the axle hole from from 40mm to 50mm.


I then cut back the wheel shaft's cover to make up for the space lost due to the mounting board etc


And that was about that!

The wheel sits pretty close to the dash at the moment. I really need a longer version of the white wheel axle thingy to allow it to sit 4 or 5 cm closer to the driver. I have a friend who'll hopefully make me one some time soonish. The cab will need to be out of action while that's happening though so I decided to play it for a month or so before I go for that. It's playable now if not ideal.

Here's a little vid of a friend giving it a whirl.


As for other things I may possibly do:
Add the missing buttons in the dash and wire them up to something. Currently only the start button is populated, that's the degauss
replace 4 way shifter with an up / down and wire it up. Currently the shifter is just for show. I use the paddles mounted on the wheel
swap monitor, either for another 31k CRT with no burn (this has ID burn and isn't amazing in terms of geometry etc) or possibly or an LCD. The Sega framed LCD upgrade is unfortunately out of my price range at the minute.

Wednesday, July 13, 2011

Initial D project part 2

Next job was to sort the pedals. I took apart the microsoft pedals and had a look at the potentiometers.


Metering them across the points highlighted up there showed the are 5k ohm. That was great news since that's the same value as in sega pedals like the new old stock initial D ones I picked up last week. The microsoft ones only move through around 10 degrees, a lot smaller rotation than the sega ones but the value changes are the same.

Here are the pots in the ID pedals.


They terminate in 3 pin AMP connectors. I stripped those off along with the jack on the end of the microsoft pedal leads and (after spending a fair bit of time checking the wiring) connected up the microsoft wiring to the sega pedals with a terminal block. I took a closeup so you can see what goes where.


At some point I may swap these over to AMPs or another neat solution but it'll do for the moment.

The great news is that it works perfectly! I was pretty excited when it just worked since I'd kind of expected more of a struggle to get it sorted. They work 100% fine. a full range of values across the full play on both pedals i.e. reading of zero when not depressed, reading of 100 when fully depressed and 50 reading in the middle. These are a massive improvement over the microsoft ones.

Monday, July 11, 2011

Neo print stuff on YAJ

A friend pointed me in the direction of this YAJ auction for all the internal gubbins from a neo print cab. I've taken the photos out of the auction and put them up here for when that link goes dead. Nice to have a peek at the guts!

http://page5.auctions.yahoo.co.jp/jp/auction/e112462178


Sunday, July 10, 2011

Initial D project part 1

First, build the shell....

I got this cab in pieces. The first step is to pop the shell back together.

Start with the main base section


Add the pcb mounting boards. Empty in this case apart from the transformer and little power distribution board.

The pedal mounting box thingy goes on next. Four bolts.

Then the lower monitor frame. More bolts either side.


Side panels next.

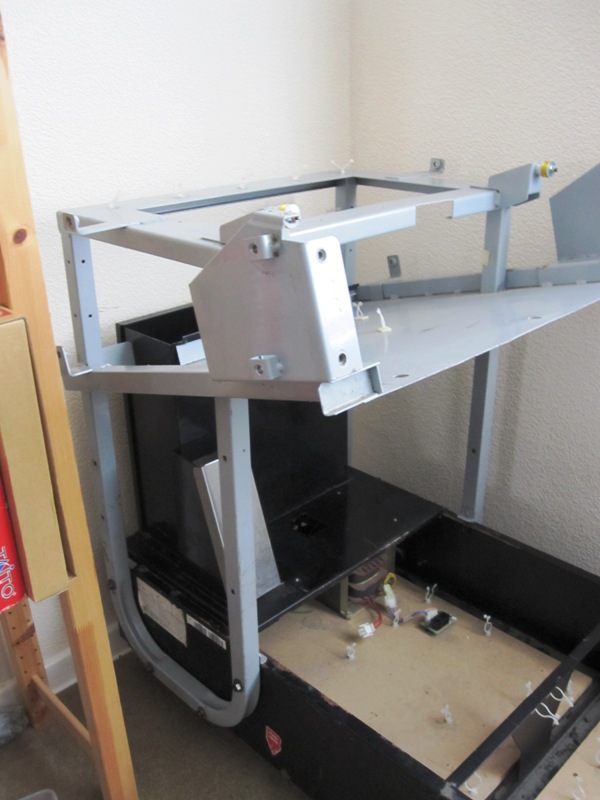
And then the top monitor mounting bracket.

The monitor goes in next. There's a 29e31s in this one at the moment

On with top monitor cover and the topper box. I had to remove the front section (just a couple of security torx screws) to insert some of the bolts and wire it up

You can also pop on the rear monitor cover at his point once you've hooked up the monitor power and VGA and fiddled with any pots you need to on the chassis.

The seat also came in a lot of bits. his small base section goes on with a few bolts

Followed by the larger piece which bolts to the main body of the cab.

In the shots below the main body of the cab is all assembled. I've also popped the pedals in place (more on them later), inserted a 5.1 audio amp (big silver box in the base) and attached some speakers to it. There are the two original speakers flanking the monitor, a central one which you can see in the behind CP space, a large active woofer under the seat (decased) and two speakers in the gull wings. ID didn't come with gullwing speakers despite having the cases for them so I fitted a couple I had lying around. They're a lot smaller than the stock ones but do the job.


Saturday, July 9, 2011

18 wheeler drive belt replacement

Thought I'd throw some pics of this up in case anyone else needs the info. It's probably the same process in a crazy taxi / jumbo safari etc.

You'll need a spanner or socket set, philips head screwdriver, allen keys and a new drive belt. For 18 wheeler that was 187L 075.

First undo the three bolts to allow the cp to open.

Then undo the chain which stops it opening too far
This plate needs to come off. It's attached with four allen bolts

You then need to lever off this C ringwhich holds the axle in place.

These screws hold the potentiometer in place. You can loosen them and slide the little bracket to the side a few mm to disengage the teeth.


You can then just lift off the whole plate and slide on the drive belt. After that you just have to put it all back. The wheel will self center. You need to make sure it's lifted off the ground (I put a box under the cp front to keep it propped up) Then just make sure the pot is in it's central position when you reassemble.

I've got the cab partially built. Unfortunately the pedals are also in need or repairs. I thought they were going to be OK before I got it in hand. I also need to get a couple of minutes to look at the sound wiring since it's a bit different from a normal naomi. Not sure when I'll get this all finished since I'm too low on funds to pick up any new pieces til we get to August. I'll just have to get all I can done for free with elbow grease!

Friday, July 8, 2011

New arrival - Aero panel


I got this lovely aero track ball panel in the post yesterday. I don't have any trackball pcbs but there's some compatible stuff on a 60 in 1 I have so the ladyfriend can play the classics (big ms pacman fan).

It's a lovely panel, rare, beautiful shape and the price was right. I couldn't resist!

Wednesday, July 6, 2011

New arrivals - Last of the driver bits

Unless I've forgotten something this couple of packages should be the last of the pieces I need for the two drivers.

Just need to finish off building them now.


Cyberlead update 3


I finally got this cab up and playing properly! It's not 100% done but it is 100% playable now.

I had to replace a faulty PSU in it. The 5V couldn't be adjusted to below 5.45V. These PSUs are incredibly strangely designed. The 5V pot in particular is crazily inaccessible.


The 3 voltage pots also aren't labelled. I took this pic that show's what's what.

With the voltages set correctly the jamma > jvs i/o is also working fine. Left to do with this cab:
1) install a replacement NTSC pcb
2) sort out the LED. On power up it displays "please wait". It shows that for a minute or two then goes blank
3) the monitor needs tinkering with a bit more. It's OK now but looks a bit washed out and has a few other little issues
4) get a nice Namco logo on the top above the LED to replace the mostly worn away original one

It's great to get a bit of Mr Driller in, even if it does need a bit more attention to get it totally sorted

Tuesday, July 5, 2011

Neo print

I picked this curiosity up at the weekend


It's an SNK neo print cart and mother board. It would have lived in a cabinet much like the one in the link below

http://www.arcadeshock.com/images/images_126/l_neoprint.jpg

It's a photo machine which allows some image editing (adding borders etc), it then prints stickers of the image you came up with. There were apparently lots of carts released in Japan specially themed for certain occasions etc. I guess world versions were less numerous.

It looks a lot like an MVS set up but as you can see there's no jamma edge and the PCB is actually pretty different. I like that long row of caps down the centre. The cart apparently won't boot in an MVS mobo either, it will just hang on black screen.

An interesting piece of kit but I can't say it'll going to be much use to me!

Monday, July 4, 2011

New arrivals - Another big pile

I had a great weekend. Went to West Yorkshire for a bunch of cab play and a trip to videotronics to buy some gear. I came away with this mound of stuff. I've actually done a fair bit to cabs today and on friday night which is wothy of documenting and have a bit to write about one or two bits I picked up this weekend but that will all have to wait for later in the week when I have time. For now, I'll just put up a list of what I got and a few pics:

MS9 29 with tosh tube. This is almost burn free and will be swapped with the already very tasty one in my E2.


ID side panel. This replaces a damaged one on the cab that turned up last Friday.

Cuber lead PSU x 2
sega 4 way gear shifters x 2
barrel locks x 7
ID pedals (think these are NOS)
sega driver woofer (think this is NOS too)
sega dash
ID manual
virtua NBA naomi cart


cyberlead NTSC pcb
an interesting SNK piece I'll write a bit about later in the week

almost burn free MS8 26 tube for the other aero table

Friday, July 1, 2011

New arrivals - driving time

Got this lot delivered on Friday. Looks a bit of a jumbled mess but should be great once it's all built up. There's an almost empty Initial D cab (with monitor but no wheel, FFB, mobo etc) and all the dedicated stuff for an 18 wheeler cab which I'm going to put on a naomi shell. The ID is going to have a 360 put in it.

I'm really looking forward to getting this lot up and running! I'll document the building phase when I get to it.